Cut Springs Explained: When to Use Them and How to Install
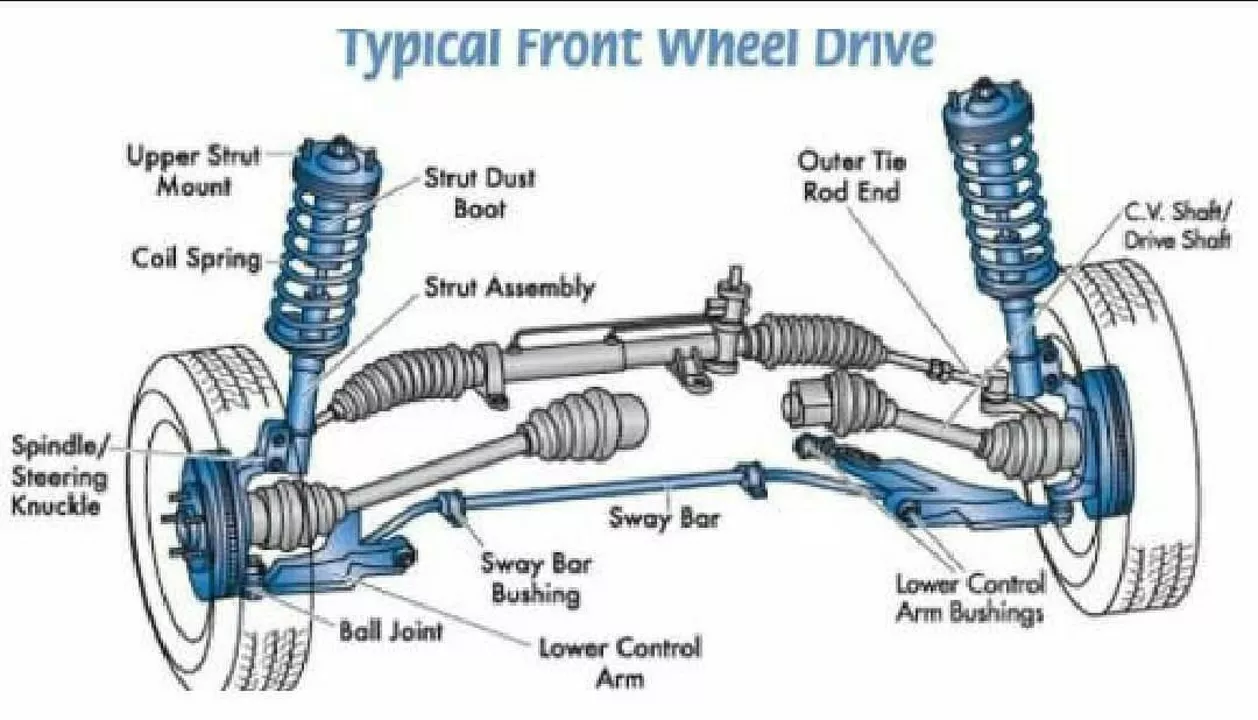
If you’ve ever scrolled through car forums you’ve probably seen the term cut springs popping up a lot. In plain English, a cut spring is a regular suspension spring that’s been shortened or trimmed to lower a car’s ride height without swapping out the whole spring. People love them because they’re cheap, easy to fit and give a more aggressive stance. Below we’ll break down what they are, when they make sense, and how you can fit them yourself.
Why Choose Cut Springs?
First off, cut springs are a budget‑friendly way to drop a few inches off your car. Instead of buying a full set of lowering springs, you simply cut the existing ones, re‑coil them and bolt them back in. The result is a lower center of gravity, which can improve handling on twisty roads. Most hobbyists prefer them for show cars or track days where a modest drop is enough to look slick and feel tighter.
Another perk is that they keep the original spring rate mostly intact. When you buy aftermarket lowering springs, the rate often changes, meaning the car might feel stiffer or harsher. With a cut spring you retain the original spring’s characteristics, so you still get a comfortable ride while the car sits lower.
How to Cut and Install a Spring
Ready to give it a go? Here’s a straightforward walk‑through. Grab a sturdy workbench, a hacksaw or a rotary cutter, and a spring compressor – you’ll need the compressor to safely compress the spring before you cut it. Safety first: always wear gloves and eye protection.
Step 1: Compress the Spring
Hook the spring into the compressor and tighten until the coil is flat. This takes the tension off and makes the metal easier to cut.
Step 2: Measure Your Desired Drop
Decide how many inches you want to lose. A common goal is a 0.5‑1 inch reduction per corner. Mark the cut line on the compressed spring with a marker.
Step 3: Cut the Spring
Using the hacksaw, cut straight across the marked line. Keep the cut as clean as possible – a jagged edge can cause stress points later.
Step 4: Re‑coil and Heat‑Treat
Release the compressor slowly and let the spring bounce back into shape. For best results, heat the cut end with a torch for a few seconds, then let it cool. This helps restore some of the original metal strength.
Step 5: Re‑install
Place the modified spring back into the suspension, securing it with the original mounts and bolts. Double‑check that everything is tight and that the spring sits evenly on both sides.
After you’ve fitted all four corners, lower the car onto the ground and check the ride height. If you’ve gone too low, you can always add a spacer or undo the cut and start again.
Cut springs are a quick win for anyone wanting a modest drop without breaking the bank. Just remember that they’re not a magic fix for all handling issues – you may still need to tweak shocks, alignment and tyre pressures to get the most out of the new stance. If you follow the steps above and stay safe, you’ll have a lower, tighter‑looking ride in no time.
Is it bad to cut springs to a lower car?
As a car enthusiast, I've been asked many times - is it bad to cut springs to lower a car? To sum it up, yes, it can be harmful to your vehicle. Cutting springs can lead to a harsher ride, compromised handling, and increased tire wear. Furthermore, it may cause safety issues and decrease the overall lifespan of your car's suspension components. So, if you're considering lowering your car, I highly recommend looking into professional lowering kits or coilovers for a safer and more reliable solution.
